A real-world guide for DevOps engineers who want zero-downtime upgrades and zero post-mortems
The Story That Started This Guide
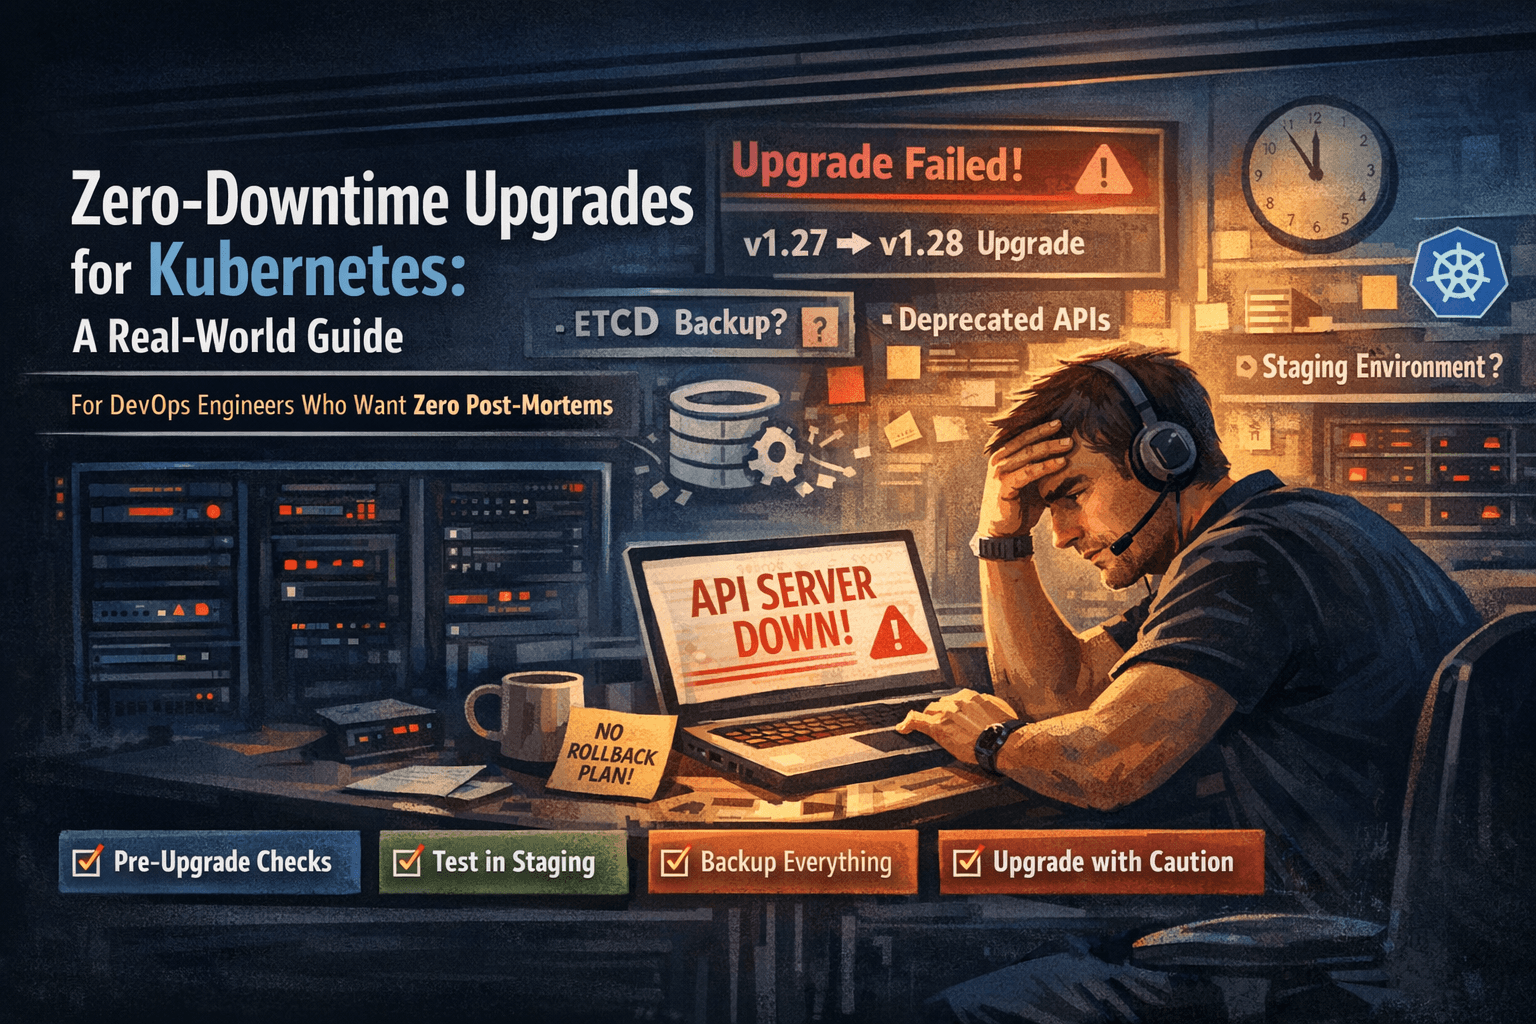
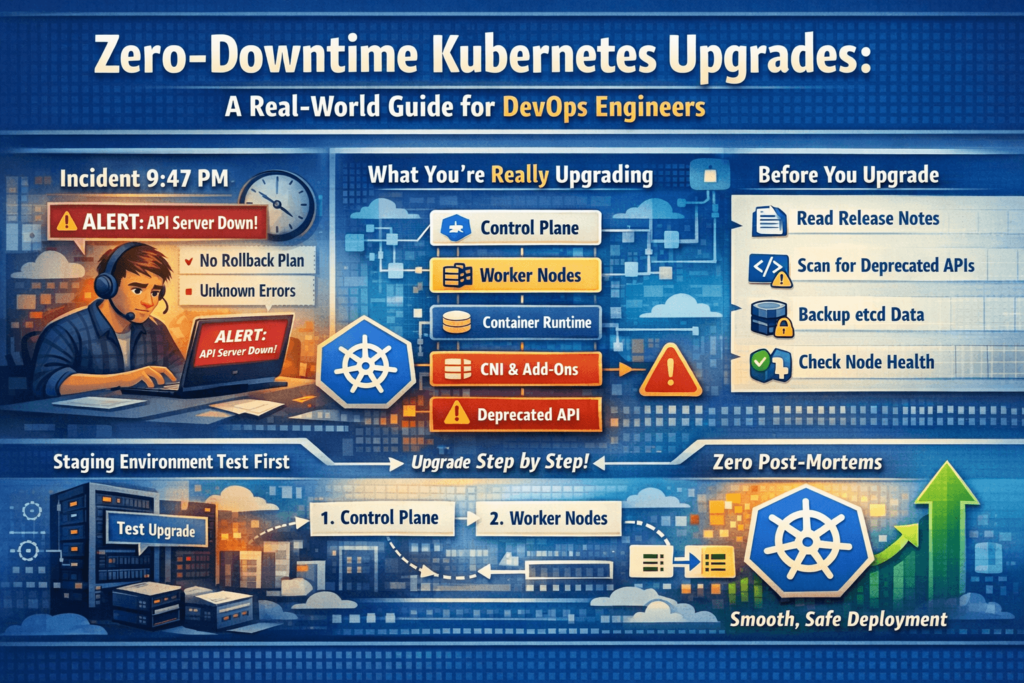
The alert came in at 9:47 PM. “API server unreachable.”
The on-call engineer opened his laptop to find that the cluster upgrade — which was “just a version bump from 1.27 to 1.28” — had gone completely sideways. The control plane was upgraded. The nodes weren’t. Half the workloads were in an unknown state. Nobody had tested on staging. Nobody checked the deprecated API removals. Nobody had a rollback plan written down.
Three hours later, the service was back. The post-mortem was long and uncomfortable.
Kubernetes upgrades look simple from the outside — just a version number going up. But inside, you’re coordinating a distributed system with multiple components, API deprecation cycles, and live workloads running on top of it the entire time. Skip one step and you’re that team writing that post-mortem.
This guide is the one I wish existed before my first production upgrade.
What You’re Actually Upgrading
Let’s clear this up first. A “Kubernetes upgrade” is not one action. It’s upgrading a stack of interconnected components — each with its own version, compatibility requirement, and failure mode.
| Component | Description | Managed By |
|---|---|---|
| Control Plane | API server, scheduler, controller manager, etcd | You (kubeadm) or cloud provider |
| Worker Nodes | kubelet, kube-proxy on every node | Always you |
| Container Runtime | containerd, CRI-O | Always you |
| CNI Plugin | Calico, Cilium, Flannel | Always you |
| Core Add-ons | CoreDNS, metrics-server | Always you |
| Managed Add-ons | VPC CNI (EKS), cloud-controller-manager | Always you — never auto-upgraded |
| Helm Charts / Manifests | Your own workload definitions | Always you |
Miss even one of these and you’ll spend an hour debugging something that had nothing to do with the upgrade itself.
The Release Cycle — What You Need to Know
Kubernetes ships a new minor version approximately every 4 months. Each minor version is supported for roughly 14 months — after that it’s end-of-life and receives no more security patches or bug fixes.
v1.26 → v1.27 → v1.28 → v1.29 → v1.30 → v1.31...
      (each ~4 months apart)
The rule that catches engineers off guard:
You can only upgrade one minor version at a time.
You cannot jump from 1.26 to 1.29. It must be 1.26 → 1.27 → 1.28 → 1.29 — three separate upgrade operations, each with its own pre-checks and validation. If you’ve been skipping upgrades for a year, plan accordingly.
# First thing to do: know where you are right now
kubectl version --short

# Check individual node versions
kubectl get nodes
# NAME                STATUS   ROLES           VERSION
# control-plane-1     Ready    control-plane   v1.27.8
# worker-node-1       Ready    <none>          v1.27.8
# worker-node-2       Ready    <none>          v1.27.8
Phase 1: Pre-Upgrade Preparation
This is where 90% of upgrade failures originate. Take your time here.
1. Read the Official Release Notes
Before touching anything, read the changelog for your target version:
https://kubernetes.io/releases/notes/
Every release documents: removed APIs, breaking behavioral changes, new features that affect how workloads run, and known issues. Spend 20 minutes here. It can save you 3 hours of debugging later.
2. Scan for Deprecated and Removed APIs with kubent
Every Kubernetes release removes APIs that were deprecated earlier. Workloads using those old APIs — in Helm charts, raw YAML, Operators, or CRDs — fail silently after the upgrade. You won’t always get an obvious error. Things just stop working.
kubent (Kubernetes No Trouble) scans your live cluster and flags exactly what needs to be fixed:
# Install kubent
sh -c "$(curl -sSfL https://git.io/install-kubent)"

# Scan your cluster
kubent
Sample output:
>>> Deprecated APIs removed in 1.25 <<<
KIND                NAMESPACE     NAME           API_VERSION          REPLACE WITH
PodSecurityPolicy   -             restricted     policy/v1beta1       (removed)
CronJob             production    db-backup      batch/v1beta1        batch/v1
HPA                 staging       frontend-hpa   autoscaling/v2beta1  autoscaling/v2
Fix every flagged resource. Update the API version in your manifests, redeploy on the current version, verify it works — then proceed.
Complete API removal reference by version:
| Removed In | Old API (Deprecated) | Replacement |
|---|---|---|
| v1.16 | extensions/v1beta1 Deployments | apps/v1 |
| v1.22 | networking.k8s.io/v1beta1 Ingress | networking.k8s.io/v1 |
| v1.25 | policy/v1beta1 PodSecurityPolicy | Pod Security Admission |
| v1.25 | batch/v1beta1 CronJob | batch/v1 |
| v1.25 | autoscaling/v2beta1 HPA | autoscaling/v2 |
| v1.26 | flowcontrol.apiserver.k8s.io/v1beta1 | v1beta3 |
| v1.27 | storage.k8s.io/v1beta1 CSIStorageCapacity | storage.k8s.io/v1 |
| v1.29 | flowcontrol.apiserver.k8s.io/v1beta2 | v1 |
3. Back Up etcd
etcd holds the entire state of your cluster — every Deployment, Secret, ConfigMap, RBAC policy, CRD, and custom resource. If the control plane upgrade corrupts etcd and you have no backup, your cluster is essentially gone.
# Create a timestamped backup
ETCDCTL_API=3 etcdctl snapshot save \
  /backup/etcd-snapshot-$(date +%Y%m%d-%H%M).db \
  --endpoints=https://127.0.0.1:2379 \
  --cacert=/etc/kubernetes/pki/etcd/ca.crt \
  --cert=/etc/kubernetes/pki/etcd/server.crt \
  --key=/etc/kubernetes/pki/etcd/server.key

# ALWAYS verify the backup — never skip this step
ETCDCTL_API=3 etcdctl snapshot status \
  /backup/etcd-snapshot-$(date +%Y%m%d-%H%M).db \
  --write-out=table
Expected output:
+----------+----------+------------+------------+
|   HASH   | REVISION | TOTAL KEYS | TOTAL SIZE |
+----------+----------+------------+------------+
| a1b2c3d4 |   198432 |       1589 |    5.4 MB  |
+----------+----------+------------+------------+
If total keys are 0 or file size is suspiciously small — something went wrong. Don’t proceed without a verified backup.
For managed clusters (GKE, EKS, AKS), the cloud provider manages etcd internally. Still verify that your cluster backup/snapshot policy is active before starting.
4. Confirm All Nodes Are Healthy
kubectl get nodes

# Look for any non-Ready states
kubectl get nodes | grep -v Ready

# Check for resource pressure conditions
kubectl describe nodes | grep -E "DiskPressure|MemoryPressure|PIDPressure|NetworkUnavailable"
Every node must show Ready with no pressure conditions. DiskPressure: True on a node means it’s already running out of disk space — draining pods onto it during the upgrade makes it worse. Resolve unhealthy nodes first, always.
5. Review PodDisruptionBudgets
During node upgrades, nodes are drained. The drain process calls the Eviction API, which respects PDBs. If a PDB blocks all evictions, the node drain hangs indefinitely and your upgrade stalls completely.
kubectl get pdb -A
# NAME                  NAMESPACE    MIN AVAILABLE  ALLOWED DISRUPTIONS
# payment-service-pdb   production   2              0   ← This will block the drain
# frontend-pdb          production   N/A            1   ← This is fine
For any PDB with ALLOWED DISRUPTIONS: 0, check why — are you already at minimum replicas? Are all pods on the same node about to be drained? Fix the root cause, or temporarily relax:
# Temporarily relax (document this change!)
kubectl patch pdb payment-service-pdb -n production \
  -p '{"spec":{"minAvailable":1}}' --type=merge

# Restore immediately after upgrade completes
kubectl patch pdb payment-service-pdb -n production \
  -p '{"spec":{"minAvailable":2}}' --type=merge
6. Verify Spare Cluster Capacity
When nodes are drained, pods need somewhere to land. If your cluster is at 90%+ utilization, evicted pods will sit Pending and your application gets partial or full downtime.
# Current node resource usage
kubectl top nodes

# Detailed breakdown of allocated vs available
kubectl describe nodes | grep -A8 "Allocated resources"
Rule of thumb: Have at least one full node’s worth of free CPU and memory before starting. For managed clusters, configure surge upgrades — the cloud provider provisions an extra node before draining old ones, meaning capacity never drops during the upgrade.
7. Test the Full Upgrade on Staging First
Every single time. I know staging never perfectly mirrors production. Do it anyway.
Run the complete upgrade on staging. Validate all application endpoints. Run your integration tests. Check your dashboards. Catch the broken Helm chart, the removed API, the misconfigured add-on — on staging, where it doesn’t matter. The 45 minutes you spend there is the 3 AM page you won’t get.
8. Notify Stakeholders and Open a Change Ticket
Inform all relevant teams. Set a maintenance window. Have people on standby. Even with zero-downtime strategies, unexpected things happen — and having the right engineers aware and available cuts recovery time dramatically.
Phase 2: The Upgrade — Order, Patience, and Discipline
The Ironclad Rule: Control Plane Before Nodes — Always
Kubernetes only supports skew in one direction. The control plane must be equal to or one version ahead of worker nodes. Never behind.
t✅ Control plane: v1.28 | Nodes: v1.27  →  Valid (transitional state during upgrade)
✅ Control plane: v1.28 | Nodes: v1.28  →  Valid (fully upgraded)
❌ Control plane: v1.27 | Nodes: v1.28  →  Never — this breaks everything
Always upgrade control plane first. Wait for it to stabilize completely. Then upgrade nodes one at a time.
Self-Managed Clusters — kubeadm
Step 1: Check the Upgrade Plan
# SSH into the control plane node first
kubeadm upgrade plan
This shows your current version, all available upgrade targets, and any configuration changes required. Read it carefully before proceeding.
Step 2: Upgrade the Control Plane
# SSH into the control plane node

# --- Upgrade kubeadm first ---
apt-mark unhold kubeadm
apt-get update && apt-get install -y kubeadm=1.28.x-00
apt-mark hold kubeadm

# Confirm kubeadm version
kubeadm version

# --- Apply the control plane upgrade ---
# This upgrades: API server, scheduler, controller manager, CoreDNS, kube-proxy
kubeadm upgrade apply v1.28.x

# --- Upgrade kubelet and kubectl on the control plane node ---
apt-mark unhold kubelet kubectl
apt-get update && apt-get install -y kubelet=1.28.x-00 kubectl=1.28.x-00
apt-mark hold kubelet kubectl

# --- Reload and restart ---
systemctl daemon-reload
systemctl restart kubelet

# --- Verify ---
kubectl get nodes
At this point, the control plane shows v1.28.x. Worker nodes still show v1.27.x. That is correct and expected. Don’t panic — you haven’t touched the workers yet.
Step 3: Upgrade Worker Nodes One at a Time
Do not rush. Complete the full sequence for one node. Verify it. Then move to the next.
# ============================================
# RUN ON YOUR WORKSTATION (not the node)
# ============================================

# 1. Cordon: stop new pods from scheduling on this node
kubectl cordon <node-name>

# 2. Drain: gracefully evict all pods off this node
kubectl drain <node-name> \
  --ignore-daemonsets \      # DaemonSets are managed separately — skip them
  --delete-emptydir-data \   # Remove pods using emptyDir volumes
  --grace-period=60          # Give apps 60s to shut down gracefully

# ============================================
# SSH INTO THE WORKER NODE
# ============================================
ssh user@<node-ip>

# 3. Upgrade kubeadm on the node
apt-mark unhold kubeadm
apt-get update && apt-get install -y kubeadm=1.28.x-00
apt-mark hold kubeadm

# 4. Apply the node configuration from the new control plane
kubeadm upgrade node

# 5. Upgrade kubelet and kubectl
apt-mark unhold kubelet kubectl
apt-get update && apt-get install -y kubelet=1.28.x-00 kubectl=1.28.x-00
apt-mark hold kubelet kubectl

# 6. Reload and restart kubelet
systemctl daemon-reload
systemctl restart kubelet

# ============================================
# BACK ON YOUR WORKSTATION
# ============================================

# 7. Uncordon: allow pods to schedule here again
kubectl uncordon <node-name>

# 8. WAIT and verify before touching the next node
kubectl get nodes
kubectl get pods -A -o wide | grep <node-name>
Wait until:
- Node shows
Readyandv1.28.x - Pods have rescheduled and are
Runningon that node
Only then move to the next worker. Rushing through nodes simultaneously is how you accidentally take down your entire application.
Managed Kubernetes
GKE (Google Kubernetes Engine)
# Step 1: Upgrade the control plane
gcloud container clusters upgrade my-cluster \
  --master \
  --cluster-version 1.28 \
  --region us-central1

# Step 2: Configure surge upgrades BEFORE upgrading node pool
# This adds 1 extra node before draining old ones — capacity never drops
gcloud container node-pools update default-pool \
  --cluster my-cluster \
  --max-surge-upgrade 1 \
  --max-unavailable-upgrade 0 \
  --region us-central1

# Step 3: Upgrade the node pool
gcloud container clusters upgrade my-cluster \
  --node-pool default-pool \
  --cluster-version 1.28 \
AKS Upgrade — Full Flow
Key concepts:
- Control plane and node pools upgrade separately
- Node pools can be max 1 minor version behind control plane
- Always set
--max-surge 1before upgrading for zero capacity loss
Step-by-step:
- Check available versions
bashaz aks get-upgrades --resource-group my-rg --name my-cluster --output table
- Set surge upgrades on node pools first
bashaz aks nodepool update --resource-group my-rg --cluster-name my-cluster --name nodepool1 --max-surge 1
- Upgrade control plane only
bashaz aks upgrade --resource-group my-rg --name my-cluster --kubernetes-version 1.28 --control-plane-only --yes
- Upgrade system node pool first
bashaz aks nodepool upgrade --resource-group my-rg --cluster-name my-cluster --name systempool --kubernetes-version 1.28
- Upgrade user node pools one at a time
bashaz aks nodepool upgrade --resource-group my-rg --cluster-name my-cluster --name apppool --kubernetes-version 1.28
- Verify everything
bashaz aks show --resource-group my-rg --name my-cluster --query "kubernetesVersion"
kubectl get nodes
kubectl get pods -n kube-system
kubectl get pods -A | grep -Ev "Running|Completed"
Upgrading EKS (Amazon Elastic Kubernetes Service) — Complete Full Flow
How EKS Upgrades Work — Understand This First
AWS manages the EKS control plane — API server, etcd, scheduler, controller manager. You don’t touch those directly. But everything else is your responsibility:
- Worker Nodes (managed or self-managed)
- CoreDNS
- kube-proxy
- VPC CNI (aws-node)
- EBS CSI Driver (if used)
- EFS CSI Driver (if used)
- Any other add-ons
The #1 EKS gotcha that burns teams:
Add-ons — CoreDNS, kube-proxy, VPC CNI — do NOT auto-upgrade when you upgrade the cluster. You must manually update every single one. Skip this and you’ll get intermittent DNS failures, networking issues, and pod communication problems that are extremely confusing to debug because the cluster “looks fine.”
The correct EKS upgrade order:
textPre-checks → Control Plane → Add-ons → Node Groups → Verify
Step 0: Pre-Upgrade Checks (EKS-Specific)
# Check current cluster version
aws eks describe-cluster \
  --name my-cluster \
  --region us-east-1 \
  --query "cluster.version" \
  --output text

# Check current node group version
aws eks list-nodegroups \
  --cluster-name my-cluster \
  --region us-east-1

aws eks describe-nodegroup \
  --cluster-name my-cluster \
  --nodegroup-name default-ng \
  --region us-east-1 \
  --query "{Version:nodegroup.version, Status:nodegroup.status, InstanceType:nodegroup.instanceTypes}"

# Check all currently installed add-ons and their versions
aws eks list-addons \
  --cluster-name my-cluster \
  --region us-east-1

# Get detail on each add-on
for addon in coredns kube-proxy vpc-cni aws-ebs-csi-driver; do
  echo "=== $addon ==="
  aws eks describe-addon \
    --cluster-name my-cluster \
    --addon-name $addon \
    --region us-east-1 \
    --query "{Version:addon.addonVersion, Status:addon.status}" \
    --output table 2>/dev/null || echo "Not installed"
done

# Check available upgrade versions for the cluster
aws eks describe-cluster \
  --name my-cluster \
  --region us-east-1 \
  --query "cluster.{CurrentVersion:version, PlatformVersion:platformVersion}"
Step 1: Check Compatible Add-on Versions for Target K8s Version
Before upgrading anything, find the correct add-on versions for your target Kubernetes version. Use these version numbers in the upgrade steps below.
# Check available CoreDNS versions for Kubernetes 1.28
aws eks describe-addon-versions \
  --addon-name coredns \
  --kubernetes-version 1.28 \
  --region us-east-1 \
  --query "addons[].addonVersions[].{Version:addonVersion, Default:compatibilities[0].defaultVersion}" \
  --output table

# Check available kube-proxy versions
aws eks describe-addon-versions \
  --addon-name kube-proxy \
  --kubernetes-version 1.28 \
  --region us-east-1 \
  --query "addons[].addonVersions[].{Version:addonVersion, Default:compatibilities[0].defaultVersion}" \
  --output table

# Check available VPC CNI versions
aws eks describe-addon-versions \
  --addon-name vpc-cni \
  --kubernetes-version 1.28 \
  --region us-east-1 \
  --query "addons[].addonVersions[].{Version:addonVersion, Default:compatibilities[0].defaultVersion}" \
  --output table

# Check EBS CSI Driver versions
aws eks describe-addon-versions \
  --addon-name aws-ebs-csi-driver \
  --kubernetes-version 1.28 \
  --region us-east-1 \
  --query "addons[].addonVersions[].{Version:addonVersion, Default:compatibilities[0].defaultVersion}" \
  --output table
Pick the version marked Default: true from each output — that’s the recommended version for your target Kubernetes version. Note them all down before proceeding.
Step 2: Upgrade the EKS Control Plane
# Trigger the control plane upgrade
aws eks update-cluster-version \
  --name my-cluster \
  --kubernetes-version 1.28 \
  --region us-east-1

# The command returns an update ID — save it
# {
#     "update": {
#         "id": "abc-123-def-456",
#         "status": "InProgress",
#         ...
#     }
# }

# Track the upgrade using the update ID
aws eks describe-update \
  --name my-cluster \
  --update-id abc-123-def-456 \
  --region us-east-1 \
  --query "update.{Status:status, Errors:errors}"

# Or just wait until the cluster is ACTIVE again
aws eks wait cluster-active \
  --name my-cluster \
  --region us-east-1

# Verify control plane version after upgrade
aws eks describe-cluster \
  --name my-cluster \
  --region us-east-1 \
  --query "cluster.{Version:version, Status:status}" \
  --output table
Control plane upgrade takes approximately 10–20 minutes. During this time:
- Your existing workloads continue running normally
- The API server may be briefly unavailable during the upgrade (seconds, not minutes)
kubectlcommands may occasionally return errors — this is expected
Do NOT start upgrading nodes or add-ons until the cluster status shows ACTIVE and version shows 1.28.
Step 3: Upgrade Add-ons (Before Nodes — Always)
This is the step most teams skip. Don’t skip it.
3a: Upgrade CoreDNS
CoreDNS handles all DNS resolution inside your cluster. Running an old CoreDNS against a new API server can cause intermittent DNS failures.
# Upgrade CoreDNS
aws eks update-addon \
  --cluster-name my-cluster \
  --addon-name coredns \
  --addon-version v1.10.1-eksbuild.6 \
  --resolve-conflicts OVERWRITE \
  --region us-east-1

# Wait for CoreDNS upgrade to complete
aws eks wait addon-active \
  --cluster-name my-cluster \
  --addon-name coredns \
  --region us-east-1

# Verify
aws eks describe-addon \
  --cluster-name my-cluster \
  --addon-name coredns \
  --region us-east-1 \
  --query "{Version:addon.addonVersion, Status:addon.status}" \
  --output table

# Confirm CoreDNS pods are running
kubectl get pods -n kube-system -l k8s-app=kube-dns
3b: Upgrade kube-proxy
kube-proxy manages network rules on each node. Version mismatch with the API server can cause networking issues.
aws eks update-addon \
  --cluster-name my-cluster \
  --addon-name kube-proxy \
  --addon-version v1.28.6-eksbuild.2 \
  --resolve-conflicts OVERWRITE \
  --region us-east-1

aws eks wait addon-active \
  --cluster-name my-cluster \
  --addon-name kube-proxy \
  --region us-east-1

# Verify
aws eks describe-addon \
  --cluster-name my-cluster \
  --addon-name kube-proxy \
  --region us-east-1 \
  --query "{Version:addon.addonVersion, Status:addon.status}" \
  --output table

# Confirm kube-proxy pods are running on all nodes
kubectl get pods -n kube-system -l k8s-app=kube-proxy
3c: Upgrade VPC CNI (aws-node)
VPC CNI manages pod networking and IP allocation on AWS. This is critical — a misconfigured VPC CNI breaks pod-to-pod communication.
aws eks update-addon \
  --cluster-name my-cluster \
  --addon-name vpc-cni \
  --addon-version v1.16.0-eksbuild.1 \
  --resolve-conflicts OVERWRITE \
  --region us-east-1

aws eks wait addon-active \
  --cluster-name my-cluster \
  --addon-name vpc-cni \
  --region us-east-1

# Verify
aws eks describe-addon \
  --cluster-name my-cluster \
  --addon-name vpc-cni \
  --region us-east-1 \
  --query "{Version:addon.addonVersion, Status:addon.status}" \
  --output table

# Confirm aws-node DaemonSet is running on all nodes
kubectl get pods -n kube-system -l k8s-app=aws-node
3d: Upgrade EBS CSI Driver (if installed)
aws eks update-addon \
  --cluster-name my-cluster \
  --addon-name aws-ebs-csi-driver \
  --addon-version v1.26.0-eksbuild.1 \
  --resolve-conflicts OVERWRITE \
  --region us-east-1

aws eks wait addon-active \
  --cluster-name my-cluster \
  --addon-name aws-ebs-csi-driver \
  --region us-east-1

# Verify
kubectl get pods -n kube-system -l app=ebs-csi-controller
3e: Upgrade EFS CSI Driver (if installed)
aws eks update-addon \
  --cluster-name my-cluster \
  --addon-name aws-efs-csi-driver \
  --addon-version v1.7.0-eksbuild.1 \
  --resolve-conflicts OVERWRITE \
  --region us-east-1

aws eks wait addon-active \
  --cluster-name my-cluster \
  --addon-name aws-efs-csi-driver \
  --region us-east-1
Step 4: Upgrade Managed Node Groups
Now that the control plane and all add-ons are on the new version, upgrade the node groups.
4a: Upgrade Default Managed Node Group
# Trigger node group upgrade
aws eks update-nodegroup-version \
  --cluster-name my-cluster \
  --nodegroup-name default-ng \
  --kubernetes-version 1.28 \
  --region us-east-1

# Save the update ID from the response for tracking
# Track upgrade progress
aws eks describe-update \
  --name my-cluster \
  --update-id <update-id-from-above> \
  --region us-east-1 \
  --query "update.{Status:status, Errors:errors}"

# Wait until node group is fully active
aws eks wait nodegroup-active \
  --cluster-name my-cluster \
  --nodegroup-name default-ng \
  --region us-east-1

# Verify
aws eks describe-nodegroup \
  --cluster-name my-cluster \
  --nodegroup-name default-ng \
  --region us-east-1 \
  --query "{Version:nodegroup.version, Status:nodegroup.status}" \
  --output table
4b: Multiple Node Groups
If you have more than one node group, upgrade them one at a time. List them all first:
bash# List all node groups
aws eks list-nodegroups \
  --cluster-name my-cluster \
  --region us-east-1 \
  --query "nodegroups" \
  --output table
Then upgrade each one, wait for it to complete, verify it, then move to the next:
# Upgrade each node group — replace names with your actual node group names
for ng in ng-general ng-compute ng-memory; do
  echo "=== Upgrading node group: $ng ==="
  aws eks update-nodegroup-version \
    --cluster-name my-cluster \
    --nodegroup-name $ng \
    --kubernetes-version 1.28 \
    --region us-east-1

  echo "Waiting for $ng to become active..."
  aws eks wait nodegroup-active \
    --cluster-name my-cluster \
    --nodegroup-name $ng \
    --region us-east-1

  echo "$ng upgraded successfully"
  echo ""
done
Step 5: For Self-Managed Node Groups on EKS
If you’re running self-managed EC2 instances (not managed node groups), you handle the upgrade differently — you replace nodes with new EC2 instances running the updated AMI.
# Step 1: Find the latest EKS-optimized AMI for your target version
aws ssm get-parameter \
  --name /aws/service/eks/optimized-ami/1.28/amazon-linux-2/recommended/image_id \
  --region us-east-1 \
  --query "Parameter.Value" \
  --output text

# Step 2: Update your Launch Template with the new AMI ID
# Do this in the AWS Console or via CloudFormation/Terraform

# Step 3: Cordon and drain each old node manually
kubectl cordon <node-name>
kubectl drain <node-name> \
  --ignore-daemonsets \
  --delete-emptydir-data \
  --grace-period=60

# Step 4: Terminate the old EC2 instance
# Your ASG will launch a new instance with the updated Launch Template
aws ec2 terminate-instances \
  --instance-ids <old-instance-id> \
  --region us-east-1

# Step 5: Verify new node joins the cluster
kubectl get nodes --watch
# New node should appear with v1.28.x and Ready status

# Repeat for each node — one at a time
Step 6: Post-Upgrade Verification for EKS
# 1. Verify cluster version
aws eks describe-cluster \
  --name my-cluster \
  --region us-east-1 \
  --query "cluster.version"
# Expected: "1.28"

# 2. Verify all node groups are on new version
aws eks list-nodegroups \
  --cluster-name my-cluster \
  --region us-east-1 \
  --query "nodegroups" | \
  xargs -I {} aws eks describe-nodegroup \
    --cluster-name my-cluster \
    --nodegroup-name {} \
    --region us-east-1 \
    --query "{Name:nodegroup.nodegroupName, Version:nodegroup.version}"

# 3. Verify all nodes in kubectl
kubectl get nodes
# All nodes should show v1.28.x and Ready

# 4. Verify all add-on versions
for addon in coredns kube-proxy vpc-cni aws-ebs-csi-driver; do
  echo "=== $addon ==="
  aws eks describe-addon \
    --cluster-name my-cluster \
    --addon-name $addon \
    --region us-east-1 \
    --query "{Version:addon.addonVersion, Status:addon.status}" \
    --output table 2>/dev/null || echo "Not installed"
done

# 5. All kube-system pods healthy?
kubectl get pods -n kube-system

# 6. Any pods in bad state?
kubectl get pods -A | grep -Ev "Running|Completed"

# 7. Any warning events?
kubectl get events -A \
References & Further Reading
Official Kubernetes Documentation
| Topic | Link |
|---|---|
| Kubernetes Release Notes & Changelog | https://kubernetes.io/releases/notes/ |
| Kubernetes Version Skew Policy | https://kubernetes.io/releases/version-skew-policy/ |
| Upgrading kubeadm Clusters (Official Guide) | https://kubernetes.io/docs/tasks/administer-cluster/kubeadm/kubeadm-upgrade/ |
| Deprecated API Migration Guide | https://kubernetes.io/docs/reference/using-api/deprecation-guide/ |
| etcd Backup & Restore | https://kubernetes.io/docs/tasks/administer-cluster/configure-upgrade-etcd/ |
| Safely Drain a Node | https://kubernetes.io/docs/tasks/administer-cluster/safely-drain-node/ |
| Kubernetes Release Cadence | https://kubernetes.io/releases/ |
| Pod Disruption Budgets | https://kubernetes.io/docs/concepts/workloads/pods/disruptions/ |
| Cluster Upgrade Strategies | https://kubernetes.io/docs/concepts/cluster-administration/cluster-administration-overview/ |
| Kubernetes Component Versioning | https://kubernetes.io/docs/concepts/overview/kubernetes-api/#api-versioning |
Managed Kubernetes — Cloud Provider Docs
| Platform | Topic | Link |
|---|---|---|
| GKE | Upgrading Clusters | https://cloud.google.com/kubernetes-engine/docs/how-to/upgrading-a-cluster |
| GKE | Surge Upgrades | https://cloud.google.com/kubernetes-engine/docs/concepts/node-pool-upgrade-strategies |
| EKS | Updating a Cluster | https://docs.aws.amazon.com/eks/latest/userguide/update-cluster.html |
| EKS | Managing Add-ons | https://docs.aws.amazon.com/eks/latest/userguide/managing-add-ons.html |
| EKS | Updating Node Groups | https://docs.aws.amazon.com/eks/latest/userguide/update-managed-node-group.html |
| AKS | Upgrading AKS Cluster | https://learn.microsoft.com/en-us/azure/aks/upgrade-cluster |
| AKS | Node Pool Upgrades | https://learn.microsoft.com/en-us/azure/aks/manage-node-pools |
AKS Reference Links
| Topic | Link |
|---|---|
| Upgrade AKS Cluster | https://learn.microsoft.com/en-us/azure/aks/upgrade-cluster |
| Upgrade Node Pools | https://learn.microsoft.com/en-us/azure/aks/manage-node-pools |
| Max Surge Upgrades | https://learn.microsoft.com/en-us/azure/aks/upgrade-cluster#customize-node-surge-upgrade |
| AKS Supported Versions | https://learn.microsoft.com/en-us/azure/aks/supported-kubernetes-versions |
| AKS Auto-upgrade Channels | https://learn.microsoft.com/en-us/azure/aks/auto-upgrade-cluster |
| AKS Release Notes | https://github.com/Azure/AKS/releases |
Tools Referenced in the Blog
| Tool | Purpose | Link |
|---|
| Tool | Purpose | Link |
|---|---|---|
| kubent | Scan cluster for deprecated API usage | https://github.com/doitintl/kube-no-trouble |
| etcdctl | etcd backup and restore tool | https://github.com/etcd-io/etcd/tree/main/etcdctl |
| kubeadm | Official cluster lifecycle management tool | https://kubernetes.io/docs/reference/setup-tools/kubeadm/ |
| kubectl | Official CLI for Kubernetes | https://kubernetes.io/docs/reference/kubectl/ |